How to Export Video Premiere Pro with Best Export Settings/Format
The 'Export Frame' feature in Premiere Pro allows you to create stills or freeze frames from your video content. To create a freeze frame, you can click on the camera icon or press Shift+E for 'Export Frame.' If you do not see the camera icon, you can add it to your panel by clicking the plus symbol, which opens your button editor.
How to export video from premiere pro TechStory
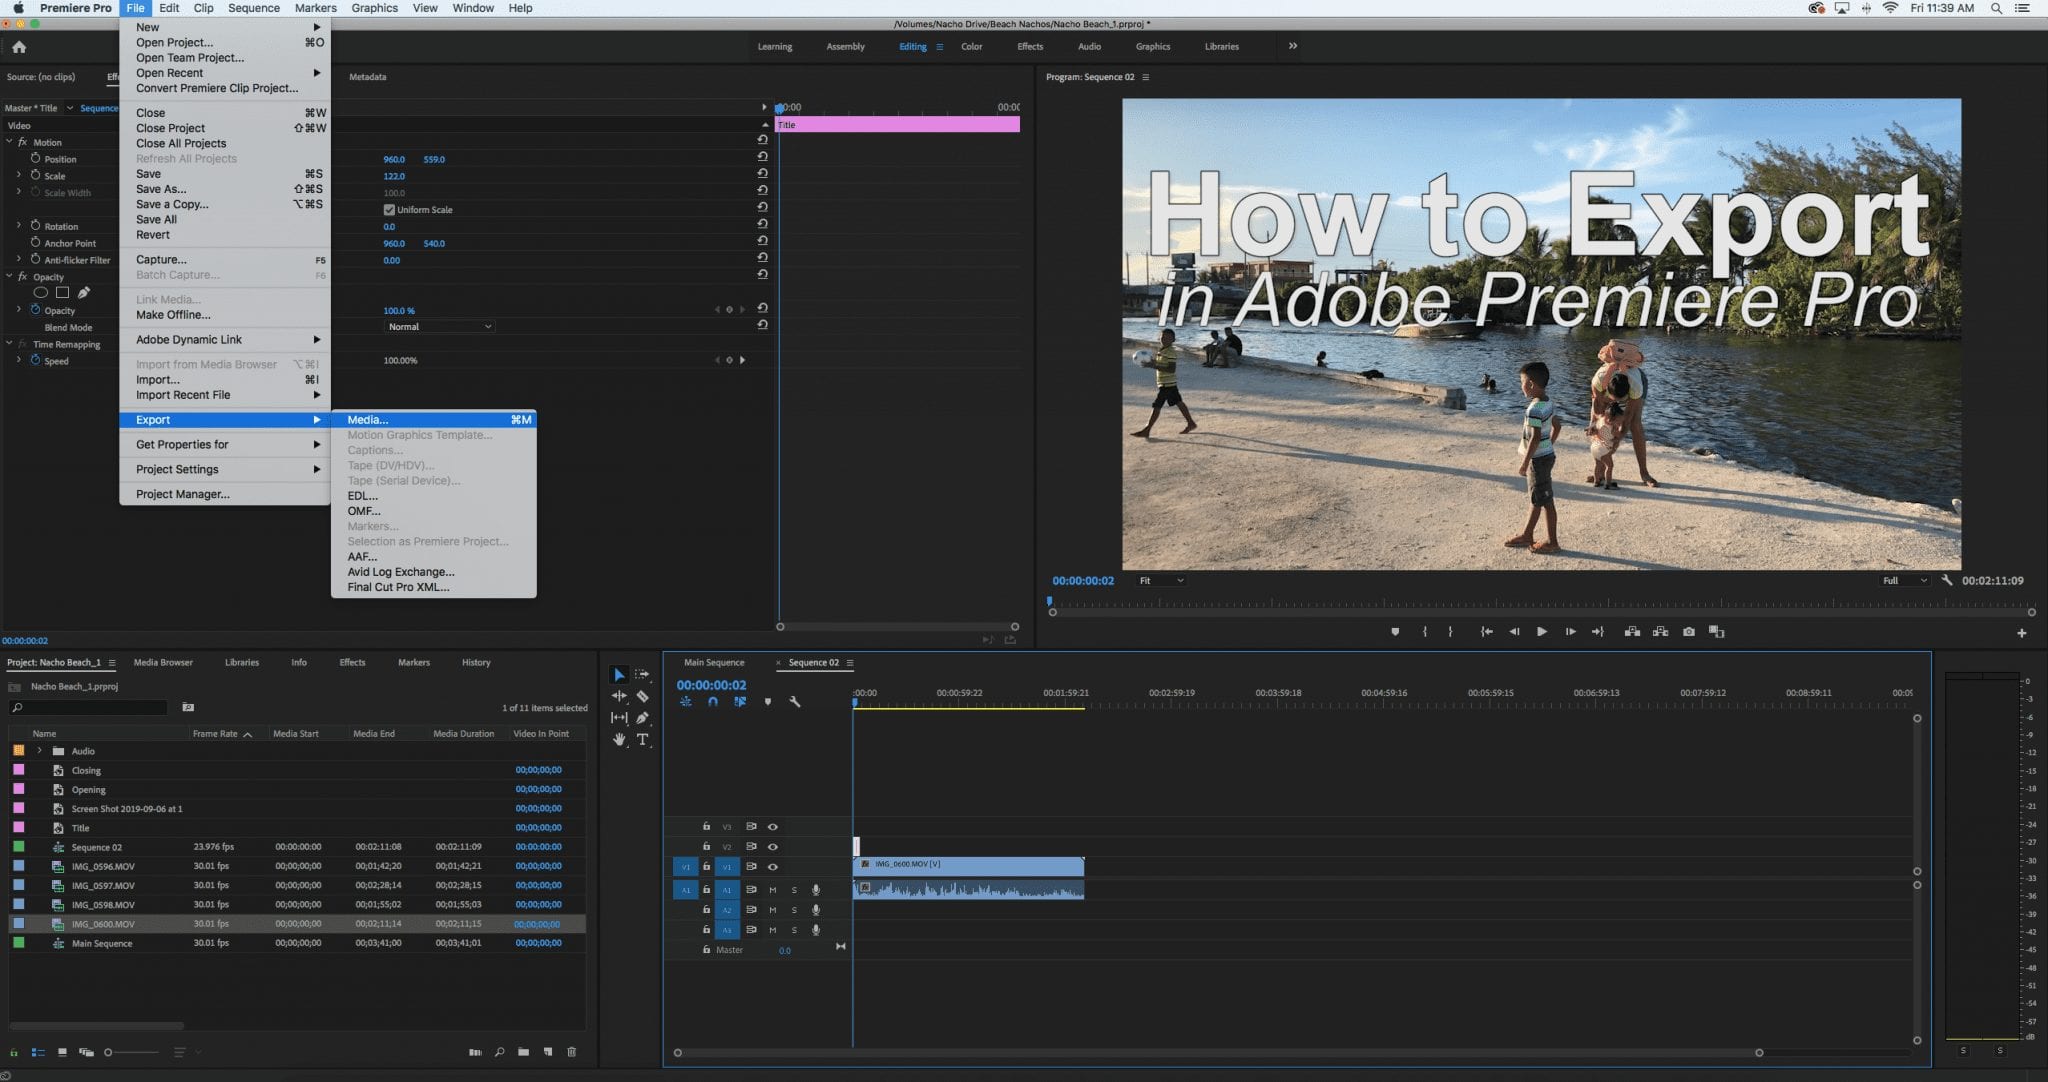
Step 1: Starting the Export Process. When your finished video is ready to start the export, open File, go to Export, and then to Media. A pop up with several settings will appear, and you can select one to export the video. The settings menu offers you several options, including rendering ones.
How to Export Video From Adobe Premiere Pro
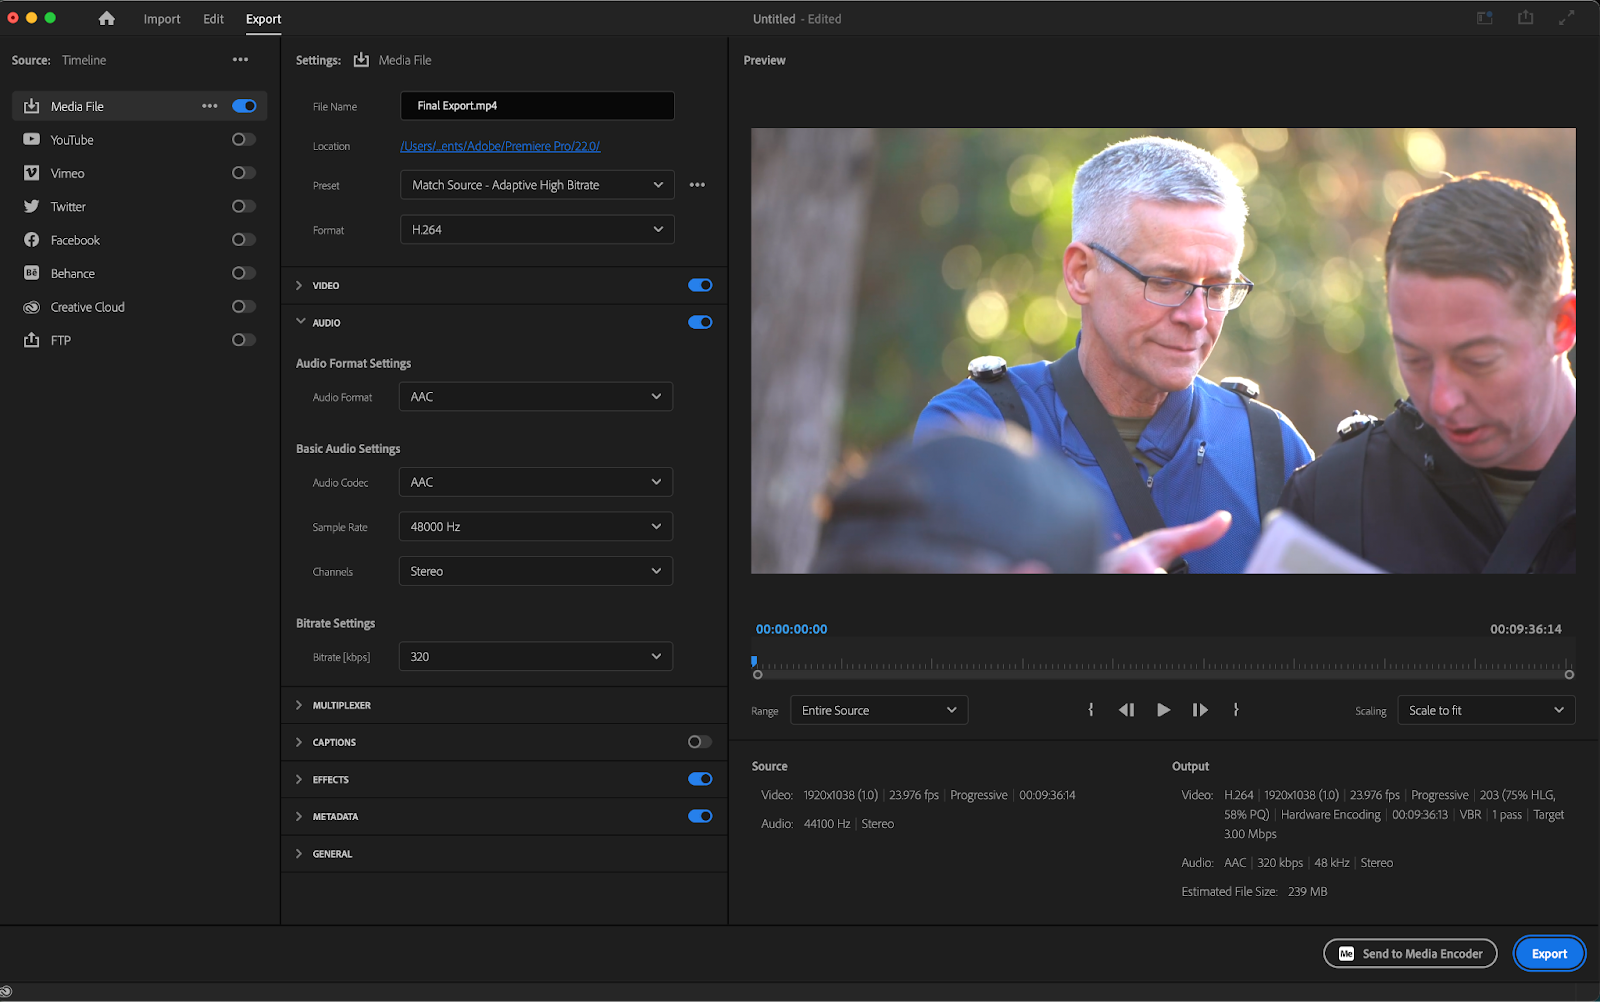
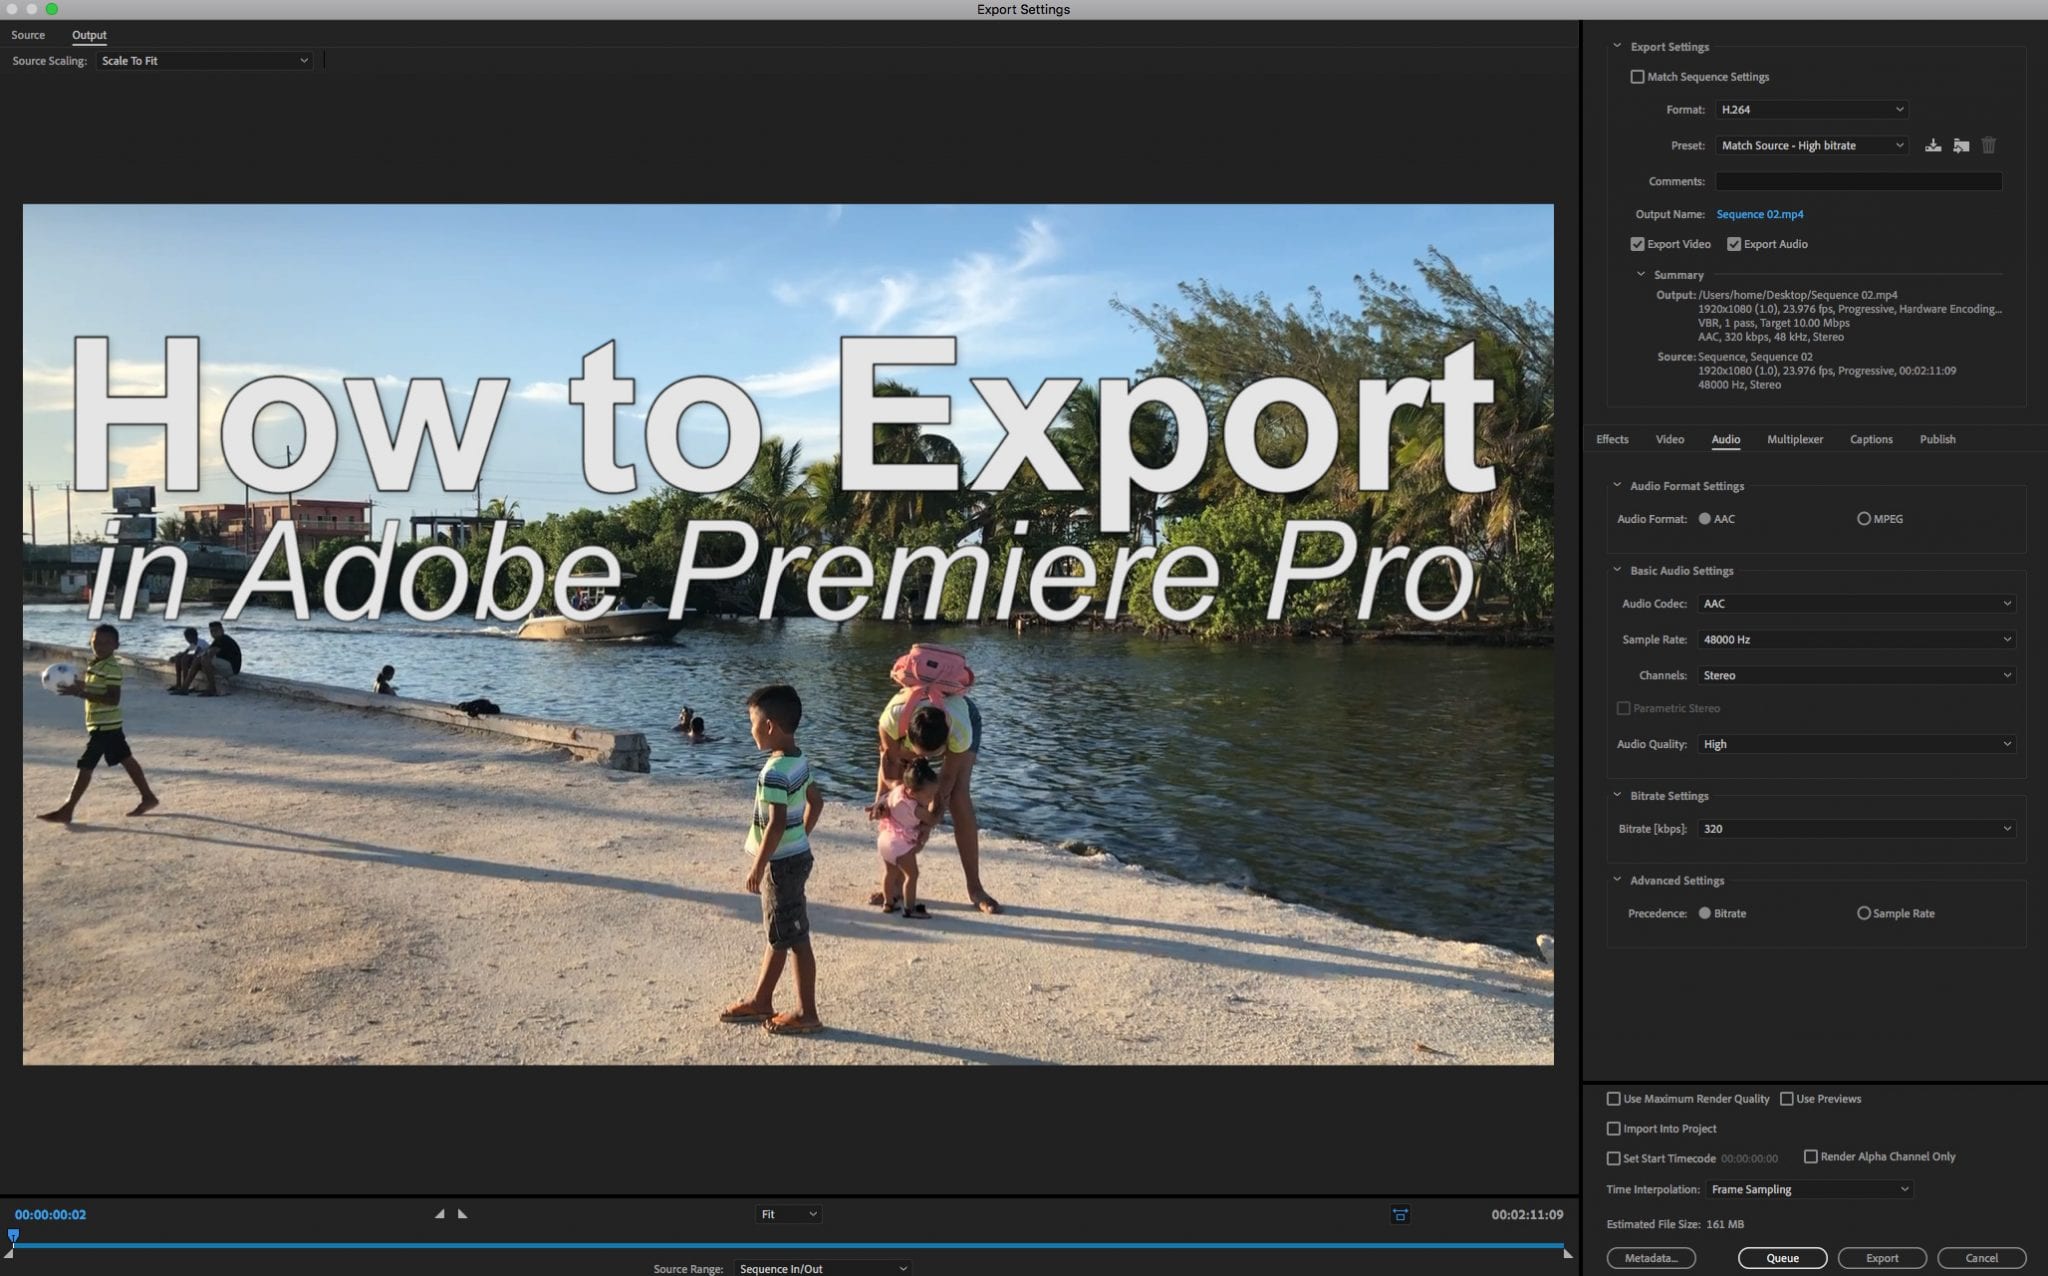
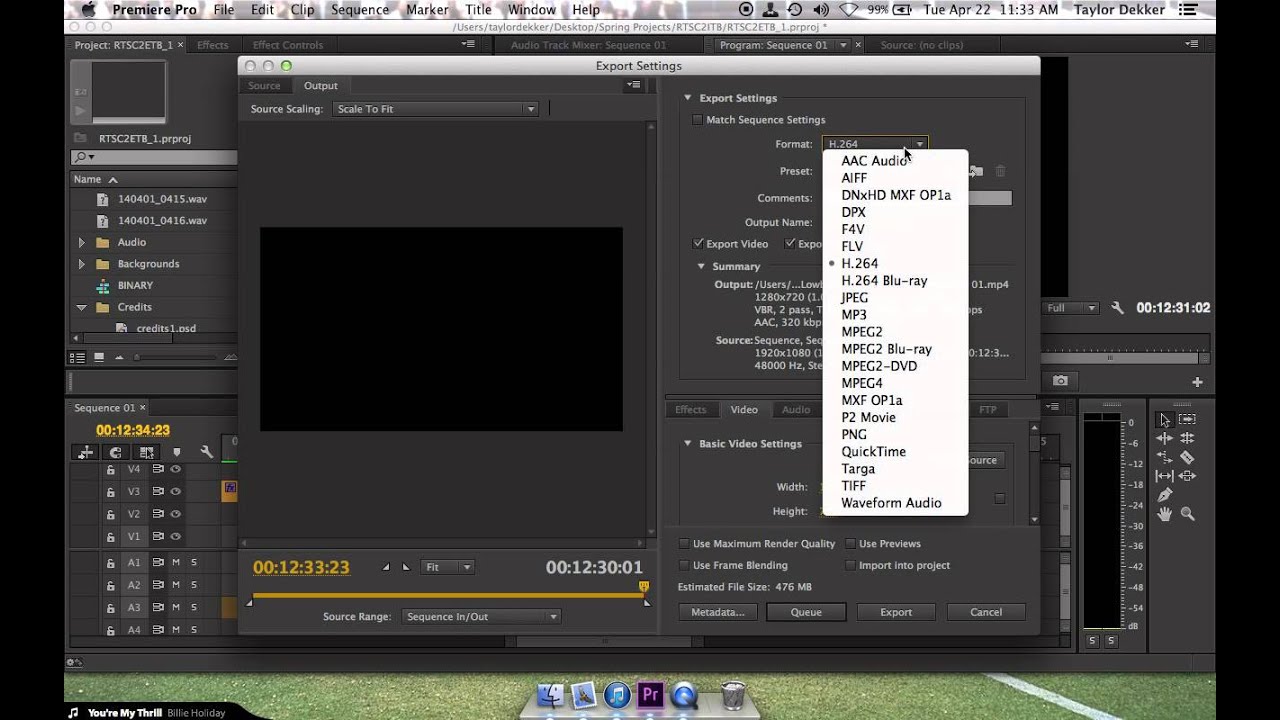
Choose Export from the header bar at the top of Premiere Pro to open the Export workspace. Type your file name in the File Name dialog and click the Location option to specify where to save your file. Choose H.264 from the Format menu. This will create an mp4 file on export.
How To Export In Premiere Pro CC (Beginner's Guide)
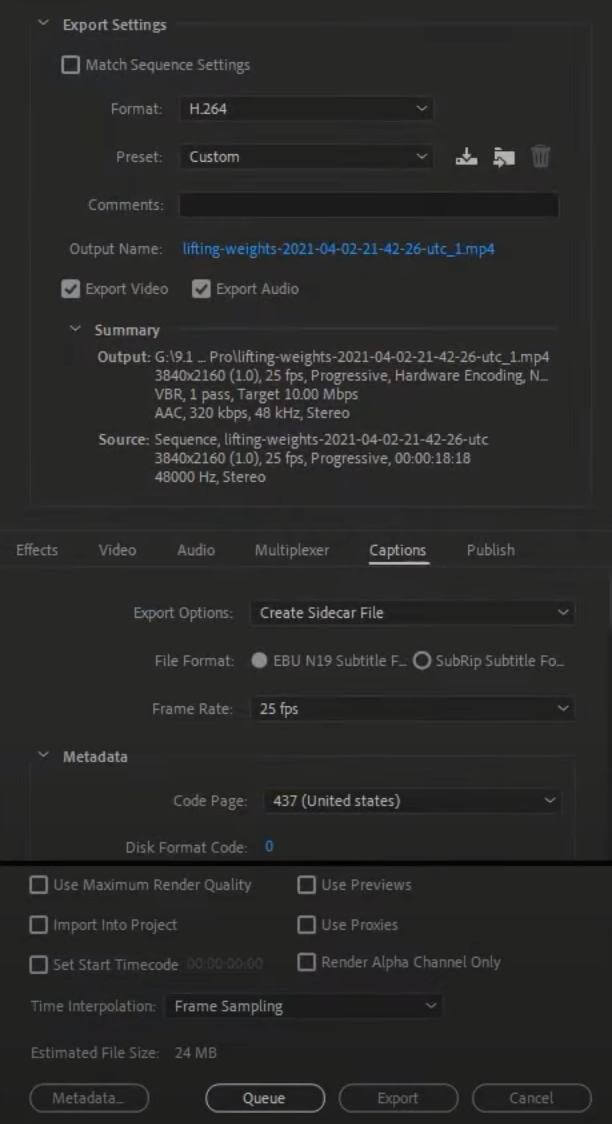
STEP 4. Go to the File Tab. Before exporting an MP4 file, you need to open File > Export > Media ( or press Ctrl+M ). STEP 5. Select Format Parameters. Open Format parameters in the Export Settings. Choose H264 in the list that opens. STEP 6. Save the Export Result.
How to Export in Adobe Premiere Pro Premiere Export Settings Rev
Step 1: Start New Project Step 2: Name the Project Step 3: Select Video Step 4: Extend the Viewing Area (Optional) Step 5: Find the Frame and Get the Shot Step 6: Export Your Image File Step 7: Retrieving Your File Step 1: Start New Project

How to Export a Still Image from Your Video in Premiere Pro YouTube
About Press Copyright Contact us Creators Advertise Developers Terms Privacy Policy & Safety How YouTube works Test new features NFL Sunday Ticket Press Copyright.

How to Export a Frame from Premiere Pro
STEP 1. Open the "Export" Dialog Window When you're finished editing your video, have done the necessary color correction, prepared the audio track, and are ready to export your project from Premiere Pro, click on "File" > "Export" > "Media" to access the dialog window that you can see in the screenshot above.

The New Export Interface in Adobe Premiere Pro 22.3 Larry Jordan
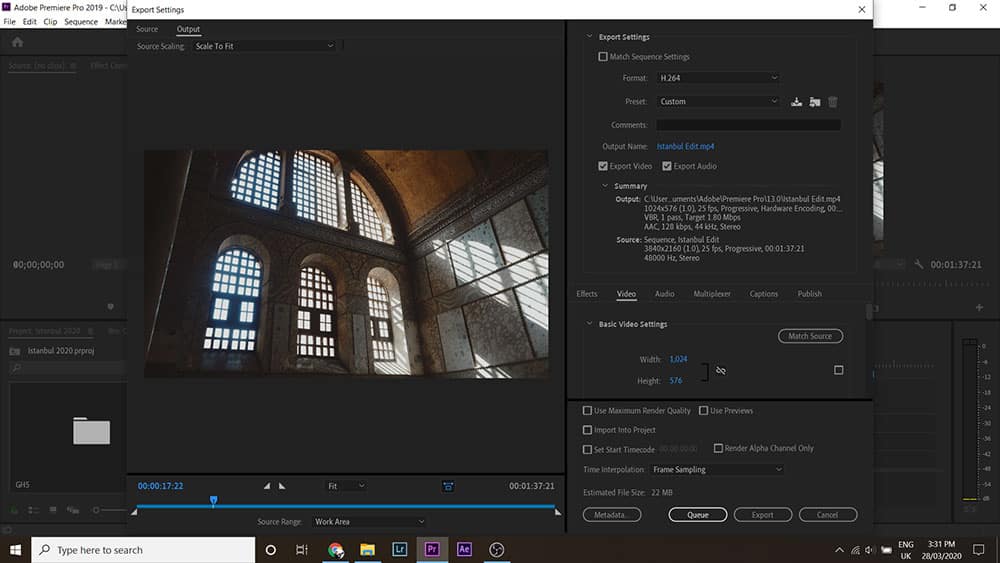
Step 1: Open the 'export' window There are a few ways to do this, but whichever method you choose, you need to have the sequence/timeline you want to export selected. You can either navigate to File -> Export -> Media or use the shortcut below. PC: Ctrl + M Mac: Cmd + M Step 2: Adjust the export format
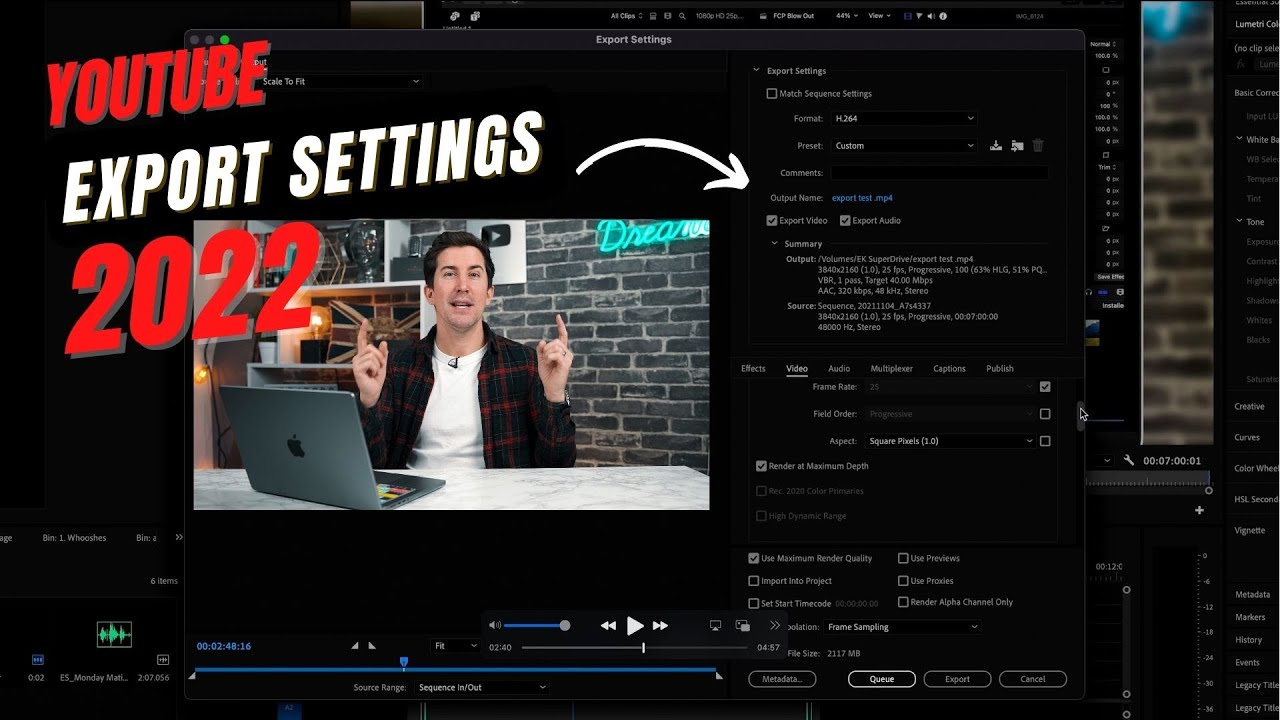
YouTube Export Settings for Adobe Premiere Pro 2022 (High Quality
Choose Your Export Settings in Premiere Pro Next hit Command+M if you're on a Mac or Control+M if you're on a PC to bring up Premiere Pro's Export Settings. Alternatively you can go under File > Export > Media. Use Cmd+M (Mac) or Ctrl+M (PC) Under the Format dropdown, select JPEG. Under Format, select JPEG

How To Export HD Video in Premiere Pro CS6, CS5.5, and CS5 for YouTube
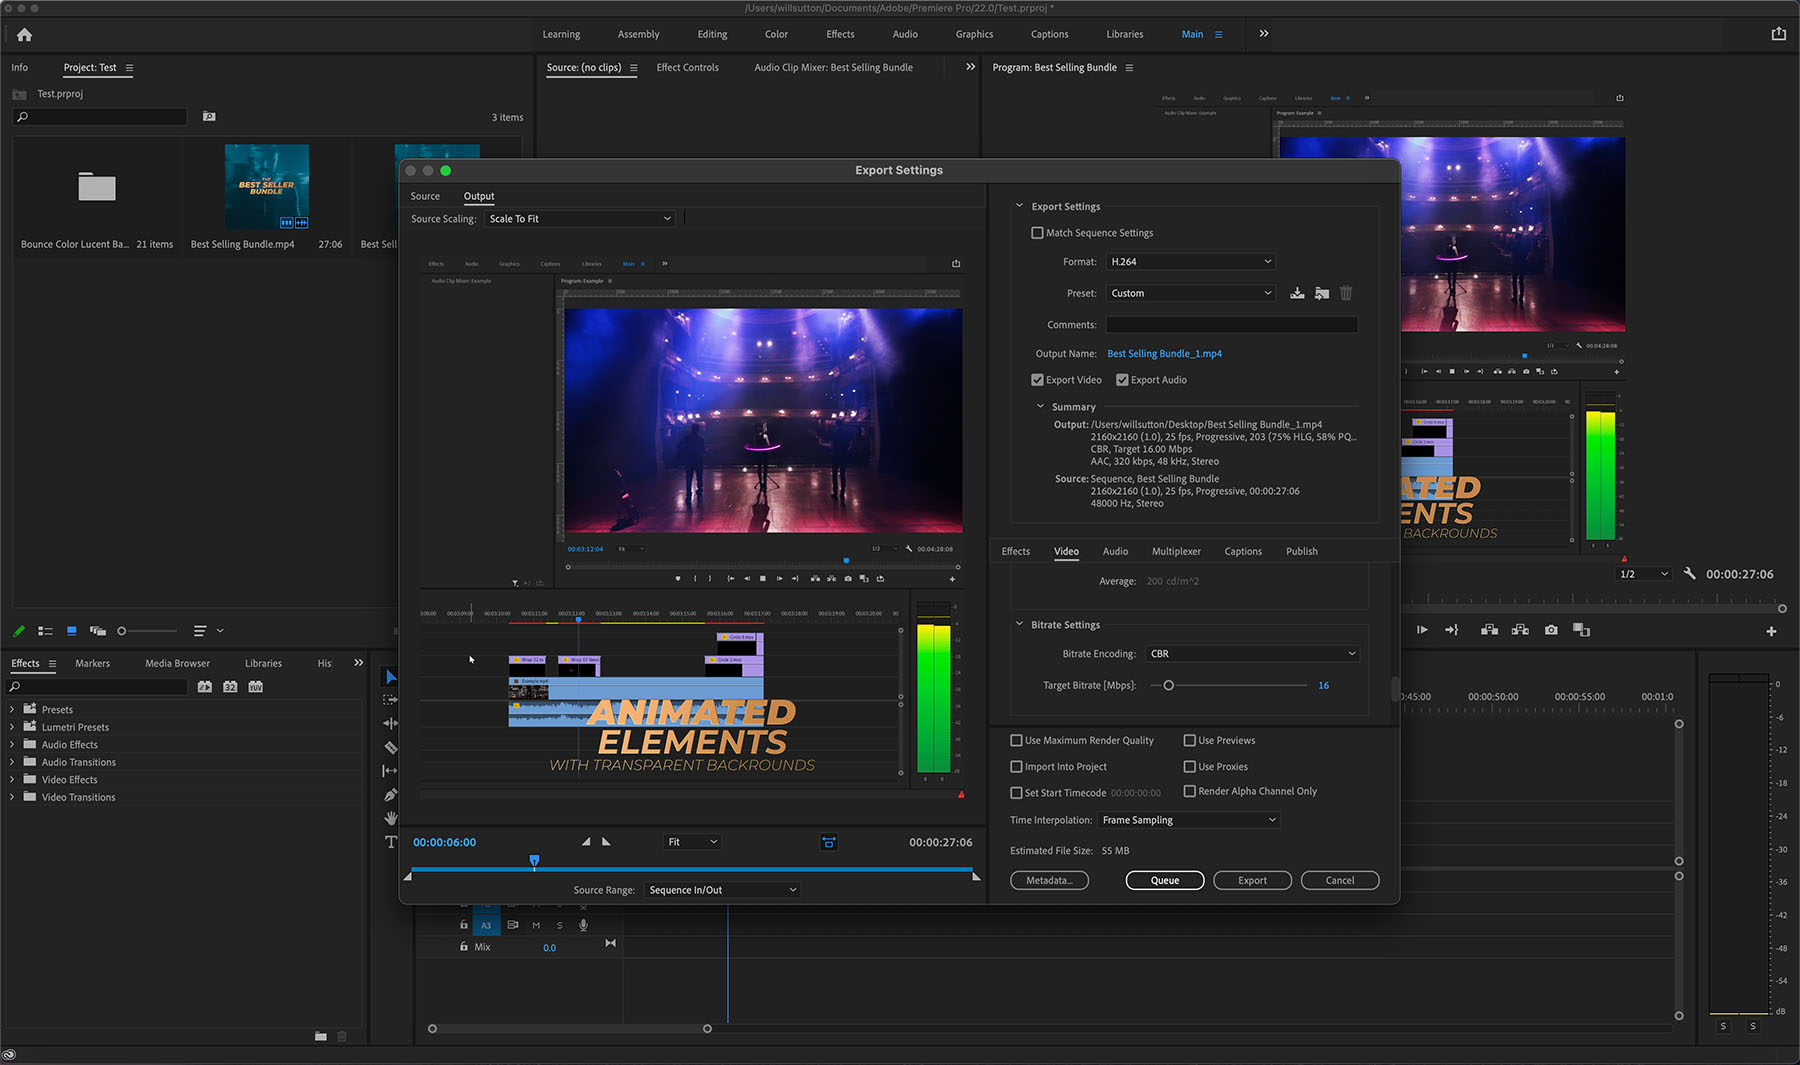
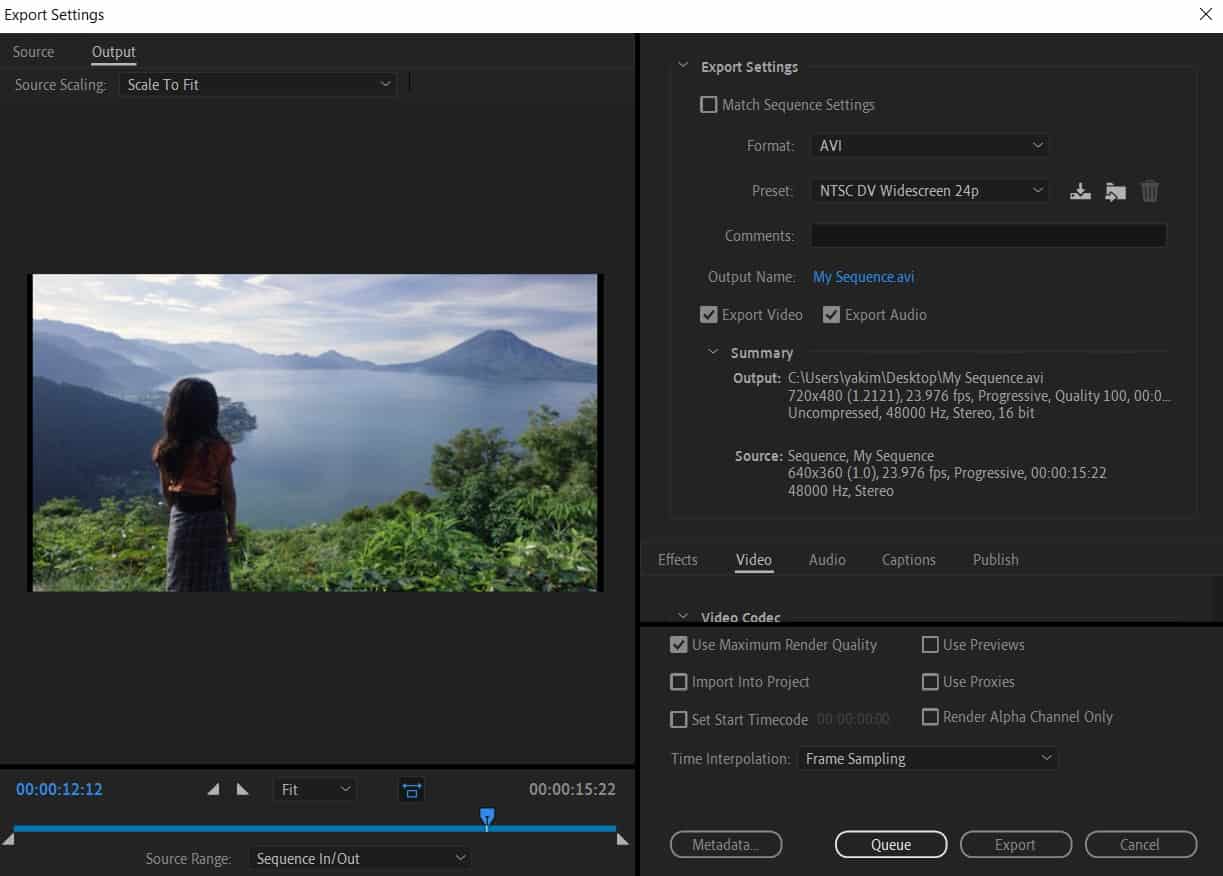
To export a video from Premiere Pro, open the Export tab (top left-hand corner). Give the video a File Name and Location. Then, set the Preset against High Quality 1080p HD, and click on Match Source under Video. Lastly, click on Export. Table of Contents. How to Export a Video in Premiere Pro [Step-by-step] 1. Open the Export tab.
Best Settings to Export Video From Premiere Pro Bounce Color®
An imported still image uses the duration specified in the Still Image preferences. You can change the duration of a still image in a sequence. The maximum frame size that can be imported for still images and movies is 256 megapixels, with a maximum dimension of 32,768 pixels in either direction. Before you import a still image into Premiere.

How to Export a Frame from Premiere Pro
Best Practices: Working with native formats Unable to migrate settings after updating Premiere Pro Green and pink video in Premiere Pro or Premiere Rush How do I manage the Media Cache in Premiere Pro? Fix errors when rendering or exporting Troubleshoot issues related to playback and performance in Premiere Pro
How to Export in Adobe Premiere Pro Premiere Export Settings Rev Blog
1. Opening the export window. To export a video in Adobe Premiere Pro you will need to click File > Export > Media. Remember to ensure that the sequence is selected that you wish to export when you do this. Here's a shortcut to: PC: Ctrl + M. Mac: CMD + M.
How to export video from premiere pro dasecab
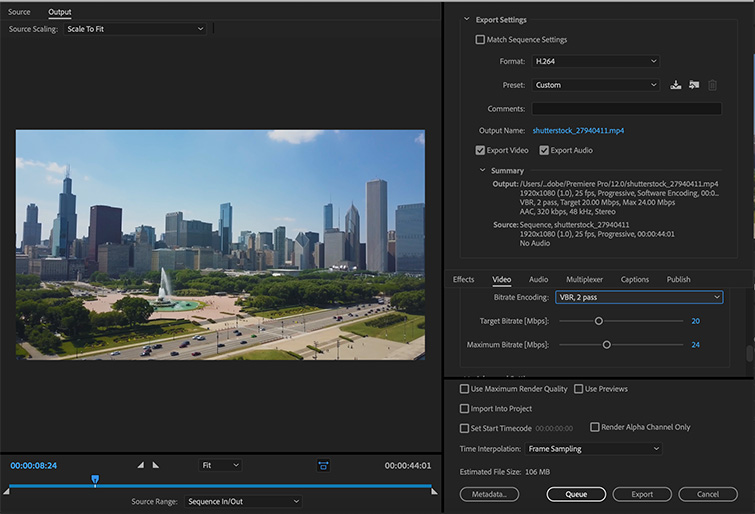
Alternatively, you can do this within the media export itself. 4. On the right side of the Media Exporter panel, you will see all the settings available to you. For an H.264 export, locate the format drop-down and select the relevant option. 5.
Adobe Premiere Pro Export Mp4 renewsinc
Best Practices: Export faster. The last step in production - the thing that stands between the final edit and the final delivery - is export. Nobody gets to go home until the export is finished so editors need the final export to go out as fast as possible . Exporting is about compression - while preserving as much of the image detail as.

HD Export settings in Adobe Premiere Pro Cs6, How to Export in Premiere
Method 1: Quick & Simple Way to Export a Frame from Premiere Pro This is the quickest method for exporting a single frame from a video as a JPG using Adobe Premiere Pro. The downside is that it doesn't give you much control over the output. 1. Position the playhead on the frame you want to export 2.
